Questions About Alstro – Part 2

As per our first post on this subject, we continue to answer some of your most pressing questions about alstroemeria.

Are Alstroemeria Annuals or Perennials?

Alstroemeria are tuberous perennials with deep, thick roots and are repeat flowering plants that grow back every year.

They are able to do this even though the stems die over winter as the roots remain healthy, allowing the plant to regenerate the following year.

Which brings us nicely on to the next question:

Are Alstroemeria Hardy Plants?

Alstroemeria are not just perennials, they are considered ‘hardy perennials’.

As long as the roots are established and deep enough (usually around 2 years after planting) alstroemeria are capable of surviving intense frosts – at times down to -50C.

However, we recommend that you mulch them in their first winter.

Do Alstroemeria Spread?

Alstroemeria form in clumps and the roots will proliferate and spread as time goes by. You will never be short of alstroemeria in the garden because of this. One of the many reasons we love them!

To spread the love more evenly you can divide them every two or so years.

What Diseases can Alstroemeria get?

  • Pythium Root Rot – A fungi that causes weak stems, wilting and stunted growth. It creeps in if the soil is too heavy and sodden for a long time. This can be rectified or prevented by making sure the soil is well-draining. However, once they're infected you’ll need to get rid of all affected plants.
  • Rhizoctonia Root Rot – Signs of this fungi are wilted leaves and dried stems that don’t get any better with watering. Once again, this is likely due to soil that isn’t draining​ well.
  • Botrytis Blight – Also known as ‘grey mould’ for good reason as it appears as furry, grey-brown spores when the weather is humid. It spreads on wet plants, so make sure there's sufficient space between them to help with air circulation. You’ll also want to irrigate them from beneath, concentrating water only on the roots, and remove old or damaged plant debris.
  • Viruses – If you see lines and/or spots on the leaves, you probably have a case of tomato spotted wilt virus or Hippeastrum mosaic virus on your hands. If so, unfortunately it is terminal and all affected plants will need to be destroyed.​ Aphids and thrips are responsible for the spread of this killer so you’ll want to try and keep those critters under control.


Do Alstroemeria like being in Pots?

Alstroemeria do very well in pots and the shorter dwarf varieties are particularly suitable.

All our alstroemeria plants are sold in 9cm pots, ready to be potted on into larger pots. They will grow quickly, easily filling a 3-litre pot within 6-8 weeks in growing season.

Some transferring tips:

  • Mix fertiliser evenly into good, fresh, multipurpose compost
  • Put some of this mix into the bottom of the new pot and place the well watered plant onto it
  • Put more compost around it. The compost should finish level with the top of the rootball, 1-2cm below the rim of the new pot (to allow for watering space)
  • Water fairly lightly from a watering can with a rose
  • Place in a warm, sunny position to grow on for 6-8 weeks in spring/summer, or over winter, until the roots have reached the bottom of the pot
  • Water lightly but frequently (the compost should dry out on the surface between watering)

And there you have it!

If you still have questions that are going unanswered, please feel free to let us know on one of our social media platforms.

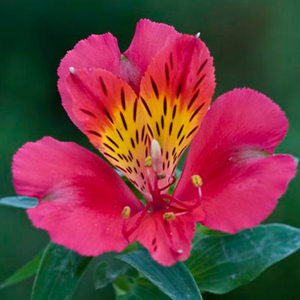
How to Plant your Alstroemeria

The Alstroemeria you ordered has just arrived at your door.

Now what?

Do you leave it in the pot it came in? Or pop it straight into the garden? Or in another pot?

Alstroemeria are quite easy-going plants. The most important thing is that they have a healthy root system when planted on.

If you’ve ordered your Alstroemeria from us it will come in a 9cm pot, ready to be potted on into a larger one and they are fast growers so will easily fill a 3 litre pot within 6-8 weeks in growing season.

Read on to find out how you can help your new Alstroemeria establish well and grow into a strong healthy plant that flowers from June to November.

In Containers

Alstroemeria are repeat bloomers through the Summer which makes them great choices for containers in the garden or a sunny balcony or patio. The short and Inticancha varieties such as ‘Noah’, ‘Little Miss Roselind’ and ‘Inticancha Navayo’ make fantastic container plants as they are nice and compact.

Here's how to get them in the pot:

  • Place some broken pottery ,tiles or gravel loosely at the bottom of your pot or container
  • Add good quality, fresh compost, mixing in some slow release fertiliser
  • Free-draining soil is essential
  • Place the well-watered plant onto the compost. Put more compost around it. The compost should finish level with the top of the rootball, 2-4cm below the rim of the new container (to allow for watering space)
  • Once in place, pat the compost down firmly but gently so as not to damage the stems – you want the plant to be secure but the compost should still be light and airy, not compressed too much
  • Water in lightly
  • Whenever the compost is getting a little dry give it a drink. If the very top of the compost is dry that’s healthy, but the compost needs to be moist around the roots
  • Remember to feed regularly once your alstroemeria starts flowering, use a liquid feed high in potash

In the Garden Border

Alstroemeria make wonderful border plants especially the medium and tall varieties such as ‘Marguerite’, ‘Pandora’ and ‘Apollo’.

Their rainbow colour selection make alstroemeria a bright, eye catching feature that will keep producing flowers for up to 4 months a year, flowering from early Summer into Early Autumn.

Here’s how to plant your babies into garden borders:

  • Mix fertiliser and organic matter into the soil around where you want to plant: bonemeal or blood fish and bone are good choices
  • Make a planting hole in this soil to the depth that the top of the plant’s root ball is level with the top of the soil
  • If the soil is dry, fill the empty hole with water and leave it to drain
  • Place the plant in the hole, filling around it with the soil and organic matter mixture. Add the plant and firm with your hands or a lightly applied foot
  • Water well, even if rain is forecast – this helps settle the soil
  • You can add a layer of mulch to help keep the roots moist but be careful not to let the mulch pile up against the stem
  • Water occasionally and thoroughly for a month or three, until the roots get established. Occasional deep watering is better than a frequent sprinkle.


Once you’ve followed these instructions for Alstroemeria in pots or in the garden, you’ll be guaranteed flowers ‘til the cows come home (or at least the first frosts in the Autumn).

Just make sure that when the cows come home your Alstroemeria aren’t in a place they can be trampled...

And please pop us a message on social media and let us know how your planting goes, we’d love to hear from you!