The Battle with Bugs – Part 2

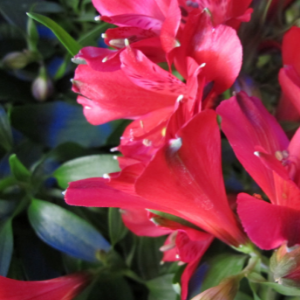
After our first post on this subject, one of our readers asked if we would talk about how to spot what bugs are bugging their alstroemeria. We'll also share some environmentally gentle ways to keep them under control.

So here is how you can spot them as well as some additional possible solutions to the ones mentioned in our previous post.

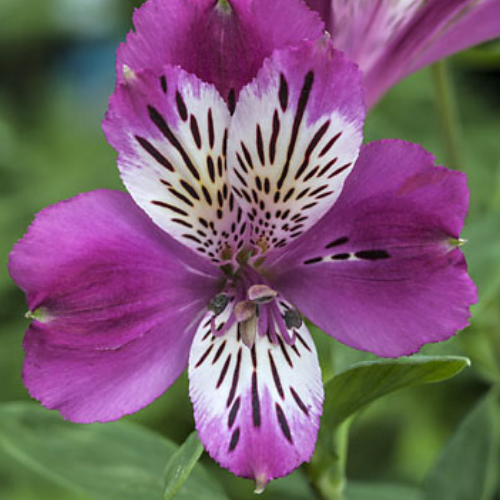
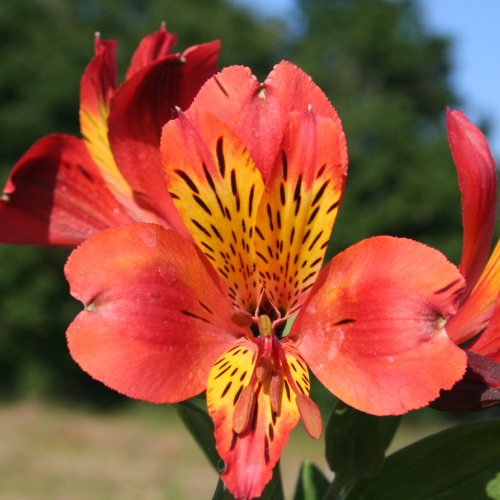
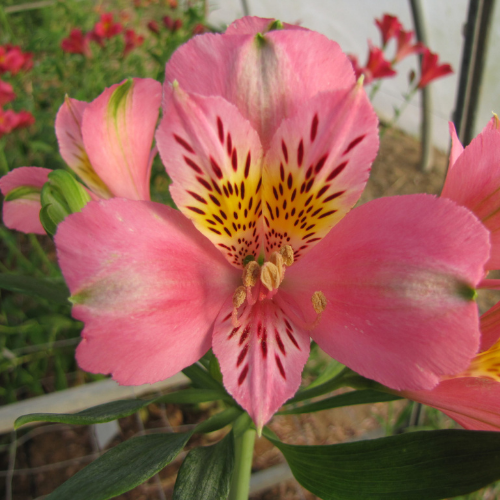
Bugs that Bug Alstroemeria


Aphids

How to spot ‘em In most cases they cause little or no damage to plant health. However, when the numbers get out of hand your alstroe can have twisted and curled/yellowed leaves, stunted or dead shoots and poor growth.
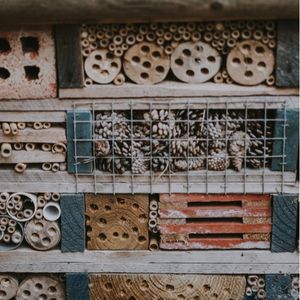
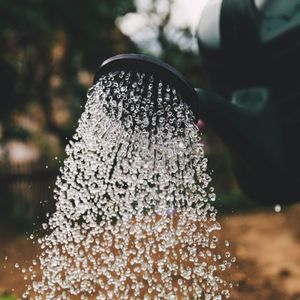
Solution Wash them off with a strong spray of water. Plant other plants that will attract natural enemies like lady beetles and wasps, as mentioned above. Organic pesticide such as neem oil can help. However, be aware that using any product on your plants can deter beneficial pests such as pollinators.

Harlequin Bug

How to spot ‘em Besides the fact that these bugs brightly coloured armour is easy to spot, the leaves will most likely be turning yellow and have white spotty areas that will eventually turn brown and cause the leaves to die.

SolutionMustard plants are their favourite. Once they have all congregated on there you can then employ the manual pick-off-and-squash method as mentioned previously.

Snails and Slugs

How to spot ‘emIrregular holes in the leaves and the flowers, aside from the usual tell-tale slime trails.
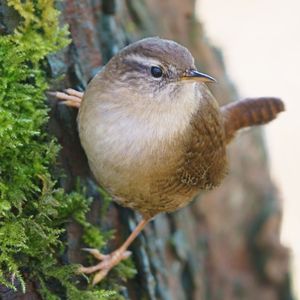
SolutionBesides the manual removal method, slugs and snails have many natural predators such as ground beetles, shrews, moles, hedgehogs, toads, lizards and songbirds. Many of these animals would not survive without their slugs and snails so make your garden into a mini ark for a variety of creatures.

Two-spotted Spider Mite

How to Spot ‘em The undersides of affected leaves are tan or yellow and have a crusty texture. Heavy infestations of spider mite make a fine webbing that may cover the entire plant.

Solution Manual removal and mindful use of organic pesticides can be effective. Predators include predatory mites, thrips, lacewings, and minute pirate bugs. Again, creating an environment that encourages these beneficial bugs is ultimately the key to bringing about balance.

Silverleaf and Sweetpotato Whiteflies

How to Spot ‘em When the weather gets warmer, keep an eye out for these little sap-suckers. Related to aphids, scales and mealybugs, their name comes from the white wax covering the wings and body on adult whiteflies. You will see a sticky honey dew-like substance on the leaves and they will be yellowing or dying.

Solution Again, the lacewings and pirate bugs can help with these too and parasitic wasps like Encarsia can help.


For more details on what these bugs look like and how to deal with them, have a look at this.

To conclude, it is possible to work in harmony with nature, but of course it may be a bit more of a trial and error process than a one-size-fits-all approach.

After all, these so-called “bugs” are just one little part of a system that hasn’t benefited from our “assistance” (read: interference).

What do you think?

Feel free to share your thoughts with us via social media.

Aphids

Aphids

Harlequin Bug

Harlequin Bug

Snails

Snails

Spider Mites

Spider Mites

Whitefly

Whitefly

The Battle with Bugs – Part 1

You starting to see more bugs in the garden?

It can be tempting to want to go out there, all guns ablazing, ready to annihilate all those pesky pests from your beloved flowers.

However, it is important to keep in mind that with critter control in gardens, the aim is not to remove all bugs completely.

It is possible to protect your plants from serious damage while maintaining an environment that attracts a variety of critters.

Working in harmony with nature encourages more diversity in the garden. This way the environment will be more balanced and it will require less interference from us.

These are some general chemical-free methods that can help control pests.

Good Hygiene

For humans, keeping things clean is in the best interests of our overall health. And it is similar with plants. Good cultivation and sanitation are the best first steps in preventing pest and disease problems in the first place.

Just like people, when plants are stressed and unloved their health suffers and DIS-ease soon follows.

So keep them well-fed and appropriately watered. Rather more seldom, long watering than frequent shorter sprinkling.

However, sometimes in spite of our efforts, disease still blows in from somewhere or certain weather brings pests to the party.

When this happens it’s best to keep an eye on your plants and keep the number of pests down, as viruses can be spread by insects.

Traps

Sticky or pheromone traps for whitefly, codling moth and plum moth can be used to good effect. This won’t get rid of all of them but it will help keep the numbers at a manageable level.

Manual Removal

If you are in your garden regularly, most bug infestations can be prevented pretty easily by manual removal. Hosing your plants can be an effective way to get rid of bugs like aphids and slugs and snails can easily be picked off.

Helpful Habitats

Some swear by what has been called “companion planting”, whereas others have found it to have little affect at all. Again, nature has so many intricate symbiotic relationships woven through it. It’s not as simple as "plant X and you’ll get Y" (interesting discussion on this here).

So here are some suggestions on plants and habitats to try that could help attract natural predators that feed on the pests. Experiment and see what works for you:

  • Coriander, Caraway, Dandelions, Fennel, Marigolds, Sunflowers, Thyme and Yarrow is loved by ladybirds that like to feed on aphids
  • Open flowers that have easily accessible pollen and nectar such as ones in the daisy and umbellifer families attract short-tongued hoverflies that predate on pests
  • Beetle banks and ground cover can attract ground beetles that feed on snails and slugs. If you buy or make a Bug Hotel, make sure it is kept dry (bugs don't like the damp)


The Crux

All in all, it seems the key is to let them all be and do their thing as much as possible. The more we start nitpicking, trying to create a perfect pest-free environment, the worse things tend to get. And the more work it is for us!

In the end they’re not really "pests". They’re all just part of a wonderfully made food chain that effortlessly takes care of itself when it’s in balance. All without our assistance!

In our next post we’ll go in to how to spot what’s bugging your alstroemeria and what you can do to bring about a balance.

Winter Gardening – What to do in January

The new year and winter is here!

It can be hard to feel enthusiastic about that when it seems the only thing going on outside is wetness and grey.

However, all you avid gardeners out there know that January is actually a fine time to prepare for a busy spring and summer.

Here’s some suggestions:

With Alstroemeria

As perennials, alstroemeria die back in winter. But they need a period of cold weather in order to stimulate shoot growth, so you can rest assured they are busy doing their thing underground.

Here’s how to support your alstroemeria during this period of hibernation so they can spring out the ground when the time is right:

In garden beds

  • Although the alstroemeria varieties we grow are garden winter hardy (withstanding soil temperatures as cold as -10°C) it is a good idea to mulch new plants well for the first couple of winters while they are establishing. This ensures they are protected until they have grown up enough to stand on their own two feet (or many roots)
  • It is best to apply a thick layer of leafy or peat-free mulch in Autumn. Composted bark is also a good option. Make sure to keep the mulch about 5cm away from the stem otherwise they may get root rot

In containers

  • Roots are more vulnerable to low temperatures when in pots than they are growing in the ground so you can move them to a location that is free of frost for the winter, such as a sheltered porch or greenhouse
  • Alstroemeria have tuberous, fleshy roots so they require sheltering and good drainage. This will prevent the compost getting too soggy with the winter rains which can also cause the dreaded root rot
  • Water lightly but frequently. The compost should dry out on the surface between watering.


General Gardening

  • Keep the birds going. Winter can be hard for them as their water sources freeze and food is more scarce so keep those feeders full and leave some of the garden a little untidy (read: wild) so they and other creatures can enjoy a bit of shelter
  • Compost/re-purpose your Christmas tree
  • Make a bug hotel and help keep your gardens eco system healthy
  • Tidy up the shed/greenhouse and sharpen your tools


Get Pruning

  • Get rid of any dead branches hanging about - plants can get too woody and untidy looking
  • Shape/reduce branches of trees and shrubs - they can get too big or start growing in the wrong direction. Relieving some weight off the top also helps the roots get stronger
  • Prune plants like roses and fruit trees as this encourages them to flower/produce fruit more vigorously


Get Transplanting

  • Prune the plant before and water thoroughly after transplanting – this helps make it less stressful for the plant
  • After pruning follow the drip line of the plant to know the how far out the roots go which will help you know how big to dig the hole
  • Be gentle when uprooting by lifting the plant out with the spade without disturbing the soil on the roots
  • When in its new spot, add some compost and bone meal to the soil and water thoroughly


Well there’s clearly plenty to be done, so we better get going!

Questions About Alstro – Part 2

As per our first post on this subject, we continue to answer some of your most pressing questions about alstroemeria.

Are Alstroemeria Annuals or Perennials?

Alstroemeria are tuberous perennials with deep, thick roots and are repeat flowering plants that grow back every year.

They are able to do this even though the stems die over winter as the roots remain healthy, allowing the plant to regenerate the following year.

Which brings us nicely on to the next question:

Are Alstroemeria Hardy Plants?

Alstroemeria are not just perennials, they are considered ‘hardy perennials’.

As long as the roots are established and deep enough (usually around 2 years after planting) alstroemeria are capable of surviving intense frosts – at times down to -50C.

However, we recommend that you mulch them in their first winter.

Do Alstroemeria Spread?

Alstroemeria form in clumps and the roots will proliferate and spread as time goes by. You will never be short of alstroemeria in the garden because of this. One of the many reasons we love them!

To spread the love more evenly you can divide them every two or so years.

What Diseases can Alstroemeria get?

  • Pythium Root Rot – A fungi that causes weak stems, wilting and stunted growth. It creeps in if the soil is too heavy and sodden for a long time. This can be rectified or prevented by making sure the soil is well-draining. However, once they're infected you’ll need to get rid of all affected plants.
  • Rhizoctonia Root Rot – Signs of this fungi are wilted leaves and dried stems that don’t get any better with watering. Once again, this is likely due to soil that isn’t draining​ well.
  • Botrytis Blight – Also known as ‘grey mould’ for good reason as it appears as furry, grey-brown spores when the weather is humid. It spreads on wet plants, so make sure there's sufficient space between them to help with air circulation. You’ll also want to irrigate them from beneath, concentrating water only on the roots, and remove old or damaged plant debris.
  • Viruses – If you see lines and/or spots on the leaves, you probably have a case of tomato spotted wilt virus or Hippeastrum mosaic virus on your hands. If so, unfortunately it is terminal and all affected plants will need to be destroyed.​ Aphids and thrips are responsible for the spread of this killer so you’ll want to try and keep those critters under control.


Do Alstroemeria like being in Pots?

Alstroemeria do very well in pots and the shorter dwarf varieties are particularly suitable.

All our alstroemeria plants are sold in 9cm pots, ready to be potted on into larger pots. They will grow quickly, easily filling a 3-litre pot within 6-8 weeks in growing season.

Some transferring tips:

  • Mix fertiliser evenly into good, fresh, multipurpose compost
  • Put some of this mix into the bottom of the new pot and place the well watered plant onto it
  • Put more compost around it. The compost should finish level with the top of the rootball, 1-2cm below the rim of the new pot (to allow for watering space)
  • Water fairly lightly from a watering can with a rose
  • Place in a warm, sunny position to grow on for 6-8 weeks in spring/summer, or over winter, until the roots have reached the bottom of the pot
  • Water lightly but frequently (the compost should dry out on the surface between watering)

And there you have it!

If you still have questions that are going unanswered, please feel free to let us know on one of our social media platforms.

Alstro in Autumn

It’s no coincidence that awesome rhymes with autumn.

But what’s so awesome about autumn?

While we may be tempted to put away all the gardening equipment and wait for the warmer weather, autumn is actually the most favourable season for gardening. Plants enjoy the cooler weather and they’ll still be cosy in their beds as the soil will likely be a bit moist and warm still. Best of all worlds!

Also, if you have alstroemeria in your garden or are thinking of adding some, you will definitely think autumn is awesome because they will still be flowering.

In fact, they’ll keep bursting with blooms right up until September and possibly even November.

Just marvelous!

Alstroemeria as Perennials

Alstroemeria are perennials and therefore repeat flowering plants. That means they die down in the winter and regrow every spring for 3 years or more. This makes them a fabulous foundation in the garden.

If your alstroemeria has been in your garden for a few seasons, you will know that they are hungry plants. They benefit from regular weekly feeds throughout growing season (May to September) with a high potash fertiliser such as our Alstroemeria Feed. This encourages them to carry on their enthusiastic flowering.

As perennials they are:

  • cold-hardy
  • not so thirsty and require less water and care after they’re established
  • low maintenance – needing just a little dead heading (see tugging method here) to keep them neat and growing vigorously
  • happy in pots and do well in pots and once they outgrow them they’ll do just as well in the garden
  • loved by pollinators, thus providing a long term service to your garden’s ecosystem (pollinators stick around and multiply where the food source is sustainable and thus consistent)
  • great companions for food growing - veggie patches and fruit trees do better when surrounded by perennials as they have a better chance of being pollinated


Preparing for winter

Get ready to mulch!

All of the alstroemeria plant varieties we grow are garden winter hardy. However, it is best to mulch the surrounding soil for the first couple of winters while they are establishing. Mulch is a layer of material, at least 5cm thick. Mulching can be done late autumn to late winter (Nov-Feb) and will help them to stay cosy and get through the winter outside.

If you’d like to keep them in their pots outside, you can also lay the pots on their sides once the plants are dormant.

However, if your alstroemeria are still new little sprogs you’ll want to make sure they are protected until they are well established and can get through the winter without any assistance. It is worth keeping your alstroemeria inside in a greenhouse or similar sheltered spot to keep them frost free and to protect them from heavy winter rains.

Remember to give them a good soak every so often, making sure their soil is free draining. Nothing worse than soggy feet...

So now you know what to do, what are you waiting for?

Go on! Get in your garden!

Questions about Alstro – Part 1

Can my alstroemeria and my pets be friends?

Are alstroemeria really just little lilies?

Do I need to leave my alstroemeria in my will?

Ok that last one is a bit of a stretch. But that can be true for some flowers! Like peonies!

In this two-part series we’re answering some of the questions you may have about alstroemeria. Perhaps it’s a bit of a mystery plant to you? Are you intrigued by it and want to get to know it better?

Well you’ve come to the right place.

Are Alstroemeria Lilies?

The short answer is no.

The longer answer is that despite their lily-like appearance and being known as Peruvian Lily and Lily of the Incas, alstroemeria are not true lilies. They belong to the Alstroemeriaceae family and grow wild in South America.

Why is my Alstroemeria Dying?

Here are some possibilities:

  • Slugs and snails are sliding around and can make light work of alstroemeria, especially them young and juicy ones
  • Tubers may not be planted deeply enough making them vulnerable to winter frost. They need to be planted deeply and mulched over winter
  • Root rot. Alstro can get a bit claustrophobic if mulched too determinedly. When the mulch is pushed too far down that it’s touching the roots, it can bring on the rot. So be sure to give those roots their personal space (at least 2”)
  • Too much water and soil that doesn’t drain well – soggy feet are a no-no!
  • Not enough sun. Lay off the sunscreen (shade) and get those babies tanning!


Why are my Alstroemeria not Flowering?

Too much shade may be the problem. Or the pot they’re in may be too small. As we learnt in the previous point, alstroemeria need their space!

Also, the way you harvest the flowers matters. Yanking rather than cutting encourages more vigorous growth.

Why are my Alstroemeria's Leaves Turning Yellow?

Again, not enough sunlight could be the culprit or even too much water. Otherwise, check your soil’s PH level. It should be no more than 7.

Can Humans Eat Alstroemeria?

At a restaurant and presented with some lovely alstroemeria decorating your meal? Rather keep enjoying them with your eyes and not your mouth. Eating them may lead to stomach upsets for some people.

Can my Pets and my Alstroemeria be Friends?

As established earlier, alstroemeria are not lilies. And while lilies can be dangerous for your furry friends, alstroemeria are very friendly. There’s a chance they may get a bit of an upset tummy from eating them but if you need to leave Fluffy and Felix alone with your alstro, rest assured they’ll all be just fine.

Do Deers like Eating Alstroemeria?

Deers love lilies. But now that we know alstroemeria are not true lilies you can be sure they'll be safe around these dear creatures.

We hope this helped clear up at least some of the mysteries - knowledge is power!

And keep your eyes peeled for part 2 coming soon...

'Indian Summer'
'Inticancha Cabana'
'Inca Reef'
'Inca Lucky'
'Indian Summer'

Alstroemeria in June

The unexpectedly cold weather we experienced in April has made our Alstroemeria afraid to show us their faces.

And understandably so. Those sub-zero temperatures were a shock to us too - we had to get all our winter woollies out of storage!

Like us, after the warm spell in March, you were probably all geared up to get to work on your garden over Easter. But with temperatures peaking in the single digits and snow in some areas during April, that just didn’t happen.

We hope those overnight frosts didn’t kill too much of your garden off!

Chief horticulturalist at the Royal Horticultural Society, Guy Barter, said: “Overnight frosts in April are dreaded by gardeners. Magnolia and camellia flowers are ruined, fruit blossom and young fruitlets including pears and apples are spoiled and the tender tips of potatoes will be burnt off if they appear above ground. Gardener’s hearts are in their mouths through April as they anxiously scan the weather forecasts for frost warnings ready to rush out and cover vulnerable plants to ward off damage.”

FLOWERING SEASON

Alstroemerias are very easy to grow.

In the UK they flower from May to November but are usually at their finest in July or August.

Of course, with all the topsy-turvy weather we’ve experienced, the season has been a bit delayed. So although flowering season is technically upon us we are still waiting to see them flowers!

But we should see those cute little faces popping out within the next few weeks.

WHAT TO EXPECT

If you put some Alstroemeria on backorder with us and wait patiently for them to arrive, what can you expect when they do?

Your plants will arrive in a box with a specialist care guide, which includes planting instructions and maintenance tips for your new plants. They will be carefully packed in a recyclable blister pack to hold them in place and keep them safe.

We keep our 9cm plants compact to ensure that all the energy is going into the roots of the plant to make sure they will thrive in their next home.

All our plants are picked over before shipping to remove any flower spikes and excess growth, ensuring they travel to their new home with as little damage as possible. This could mean that your new plants may have very little visible green shoots above the soil. This is not detrimental to the plant at all and does not mean that your plant is dead. Alstroemeria are extremely fast growing and will begin to shoot within a couple of weeks once planted.

There may be loose soil in the blister pack once you remove the plants, again this is not a problem -  we would expect some soil to loosen on its journey. This can either be discarded or added when the Alstroemeria is planted in to the garden or a larger pot.

Caring for your Alstroemeria

It could be said that Alstroemeria are a bit like Goldfish. Such an easy pet. You just sprinkle a few flakes at them everyday and keep those air bubbles going and there you have it. Much ado about nothin’!

Well, in a similar way Alstroemeria are such vigorous bloomers they don’t need much encouragement to keep going and growing.

But how much care does an Alstroemeria really need?

Here are some guidelines to help you along:

Feeding

Alstroemeria are hungry little creatures, so regular weekly feeds through growing season from May to September is recommended and will encourage them to flower well and repeatedly. A high potash fertiliser is recommended such as our Alstroemeria Feed.

Mulching

All of the Alstroemeria plant varieties we grow are garden winter hardy but, for the first couple of winters while they are establishing, it will be best to mulch well to make sure your new plants are protected until they are well established and can get through the winter without any assistance.

Watering

Alstroemeria are reasonably drought tolerant but will need regular watering during the summer months. If your Alstroemeria are planted in containers these tend to dry out quicker so make sure to keep the ground moist but don’t over water.

Alstroemeria need free draining soil. This is essential for them to grow well and establish in the normal way. The root system doesn’t like to be waterlogged as this can cause the roots to rot and likely cause it to die.

Picking Flowers

Alstroemeria are fabulous flowers in a vase and can last many weeks. A few tips for picking your own Alstroemeria are as follows:

Pick at the point when the buds are not yet open but have colour and looking ready to pop. They will last longer in the vase if picked at this point.

You’ll want to get hold of the stem about halfway down and give it a gentle twist followed by a sharp tug which will pull out the stem. This ensures that there are no pieces of stem left to rot which can cause fungal disease to build up on the root.

Pulling the flowering stem at the base and ripping it from the ground also encourages the plant to re-flower as it produces another bud under the ground. They‘ll then keep producing an endless supply of flowers for every vase in the home throughout the Summer.

It is best to allow the plant to become firmly established (so at least one Summer to pass after planting) until employing this method. You can still have fresh flowers by cutting them instead until the roots have had time to establish.

Dead heading

Once all the flowers in a cluster head have faded and died, remove the whole stem with a gentle tug, the same method as picking. This encourages further flower stems to sprout and keeps the plant looking neat and tidy. It also prevents it from wasting energy on producing seeds at the expense of more flowers.


So a little more care and maintenance than a Goldfish but totally worth it!

How to Plant your Alstroemeria

The Alstroemeria you ordered has just arrived at your door.

Now what?

Do you leave it in the pot it came in? Or pop it straight into the garden? Or in another pot?

Alstroemeria are quite easy-going plants. The most important thing is that they have a healthy root system when planted on.

If you’ve ordered your Alstroemeria from us it will come in a 9cm pot, ready to be potted on into a larger one and they are fast growers so will easily fill a 3 litre pot within 6-8 weeks in growing season.

Read on to find out how you can help your new Alstroemeria establish well and grow into a strong healthy plant that flowers from June to November.

In Containers

Alstroemeria are repeat bloomers through the Summer which makes them great choices for containers in the garden or a sunny balcony or patio. The short and Inticancha varieties such as ‘Noah’, ‘Little Miss Roselind’ and ‘Inticancha Navayo’ make fantastic container plants as they are nice and compact.

Here's how to get them in the pot:

  • Place some broken pottery ,tiles or gravel loosely at the bottom of your pot or container
  • Add good quality, fresh compost, mixing in some slow release fertiliser
  • Free-draining soil is essential
  • Place the well-watered plant onto the compost. Put more compost around it. The compost should finish level with the top of the rootball, 2-4cm below the rim of the new container (to allow for watering space)
  • Once in place, pat the compost down firmly but gently so as not to damage the stems – you want the plant to be secure but the compost should still be light and airy, not compressed too much
  • Water in lightly
  • Whenever the compost is getting a little dry give it a drink. If the very top of the compost is dry that’s healthy, but the compost needs to be moist around the roots
  • Remember to feed regularly once your alstroemeria starts flowering, use a liquid feed high in potash

In the Garden Border

Alstroemeria make wonderful border plants especially the medium and tall varieties such as ‘Marguerite’, ‘Pandora’ and ‘Apollo’.

Their rainbow colour selection make alstroemeria a bright, eye catching feature that will keep producing flowers for up to 4 months a year, flowering from early Summer into Early Autumn.

Here’s how to plant your babies into garden borders:

  • Mix fertiliser and organic matter into the soil around where you want to plant: bonemeal or blood fish and bone are good choices
  • Make a planting hole in this soil to the depth that the top of the plant’s root ball is level with the top of the soil
  • If the soil is dry, fill the empty hole with water and leave it to drain
  • Place the plant in the hole, filling around it with the soil and organic matter mixture. Add the plant and firm with your hands or a lightly applied foot
  • Water well, even if rain is forecast – this helps settle the soil
  • You can add a layer of mulch to help keep the roots moist but be careful not to let the mulch pile up against the stem
  • Water occasionally and thoroughly for a month or three, until the roots get established. Occasional deep watering is better than a frequent sprinkle.


Once you’ve followed these instructions for Alstroemeria in pots or in the garden, you’ll be guaranteed flowers ‘til the cows come home (or at least the first frosts in the Autumn).

Just make sure that when the cows come home your Alstroemeria aren’t in a place they can be trampled...

And please pop us a message on social media and let us know how your planting goes, we’d love to hear from you!